This post is also published in blog.saeloun.com and featured in Ruby Weekly issue #665.
With Replicate, we can run machine learning models in the cloud without the need to set up our own infrastructure or have in-depth knowledge about machine learning. Replicate allows us to run both public and private models.
Let’s understand some terminologies that are used in Replicate,
- Models - Models are referred to as trained packages, and published software package that accepts input and return output.
- Versions - Similar to software applications, Machine Learning models will also be changed and new versions will be published.
- Predictions - Predictions is the object that has the result generated by models based on the input provided and metadata about the result.
We can run models in Replicate in the browser and with APIs, the best way to explore different models is by running models from the browser.
Running model in browser:
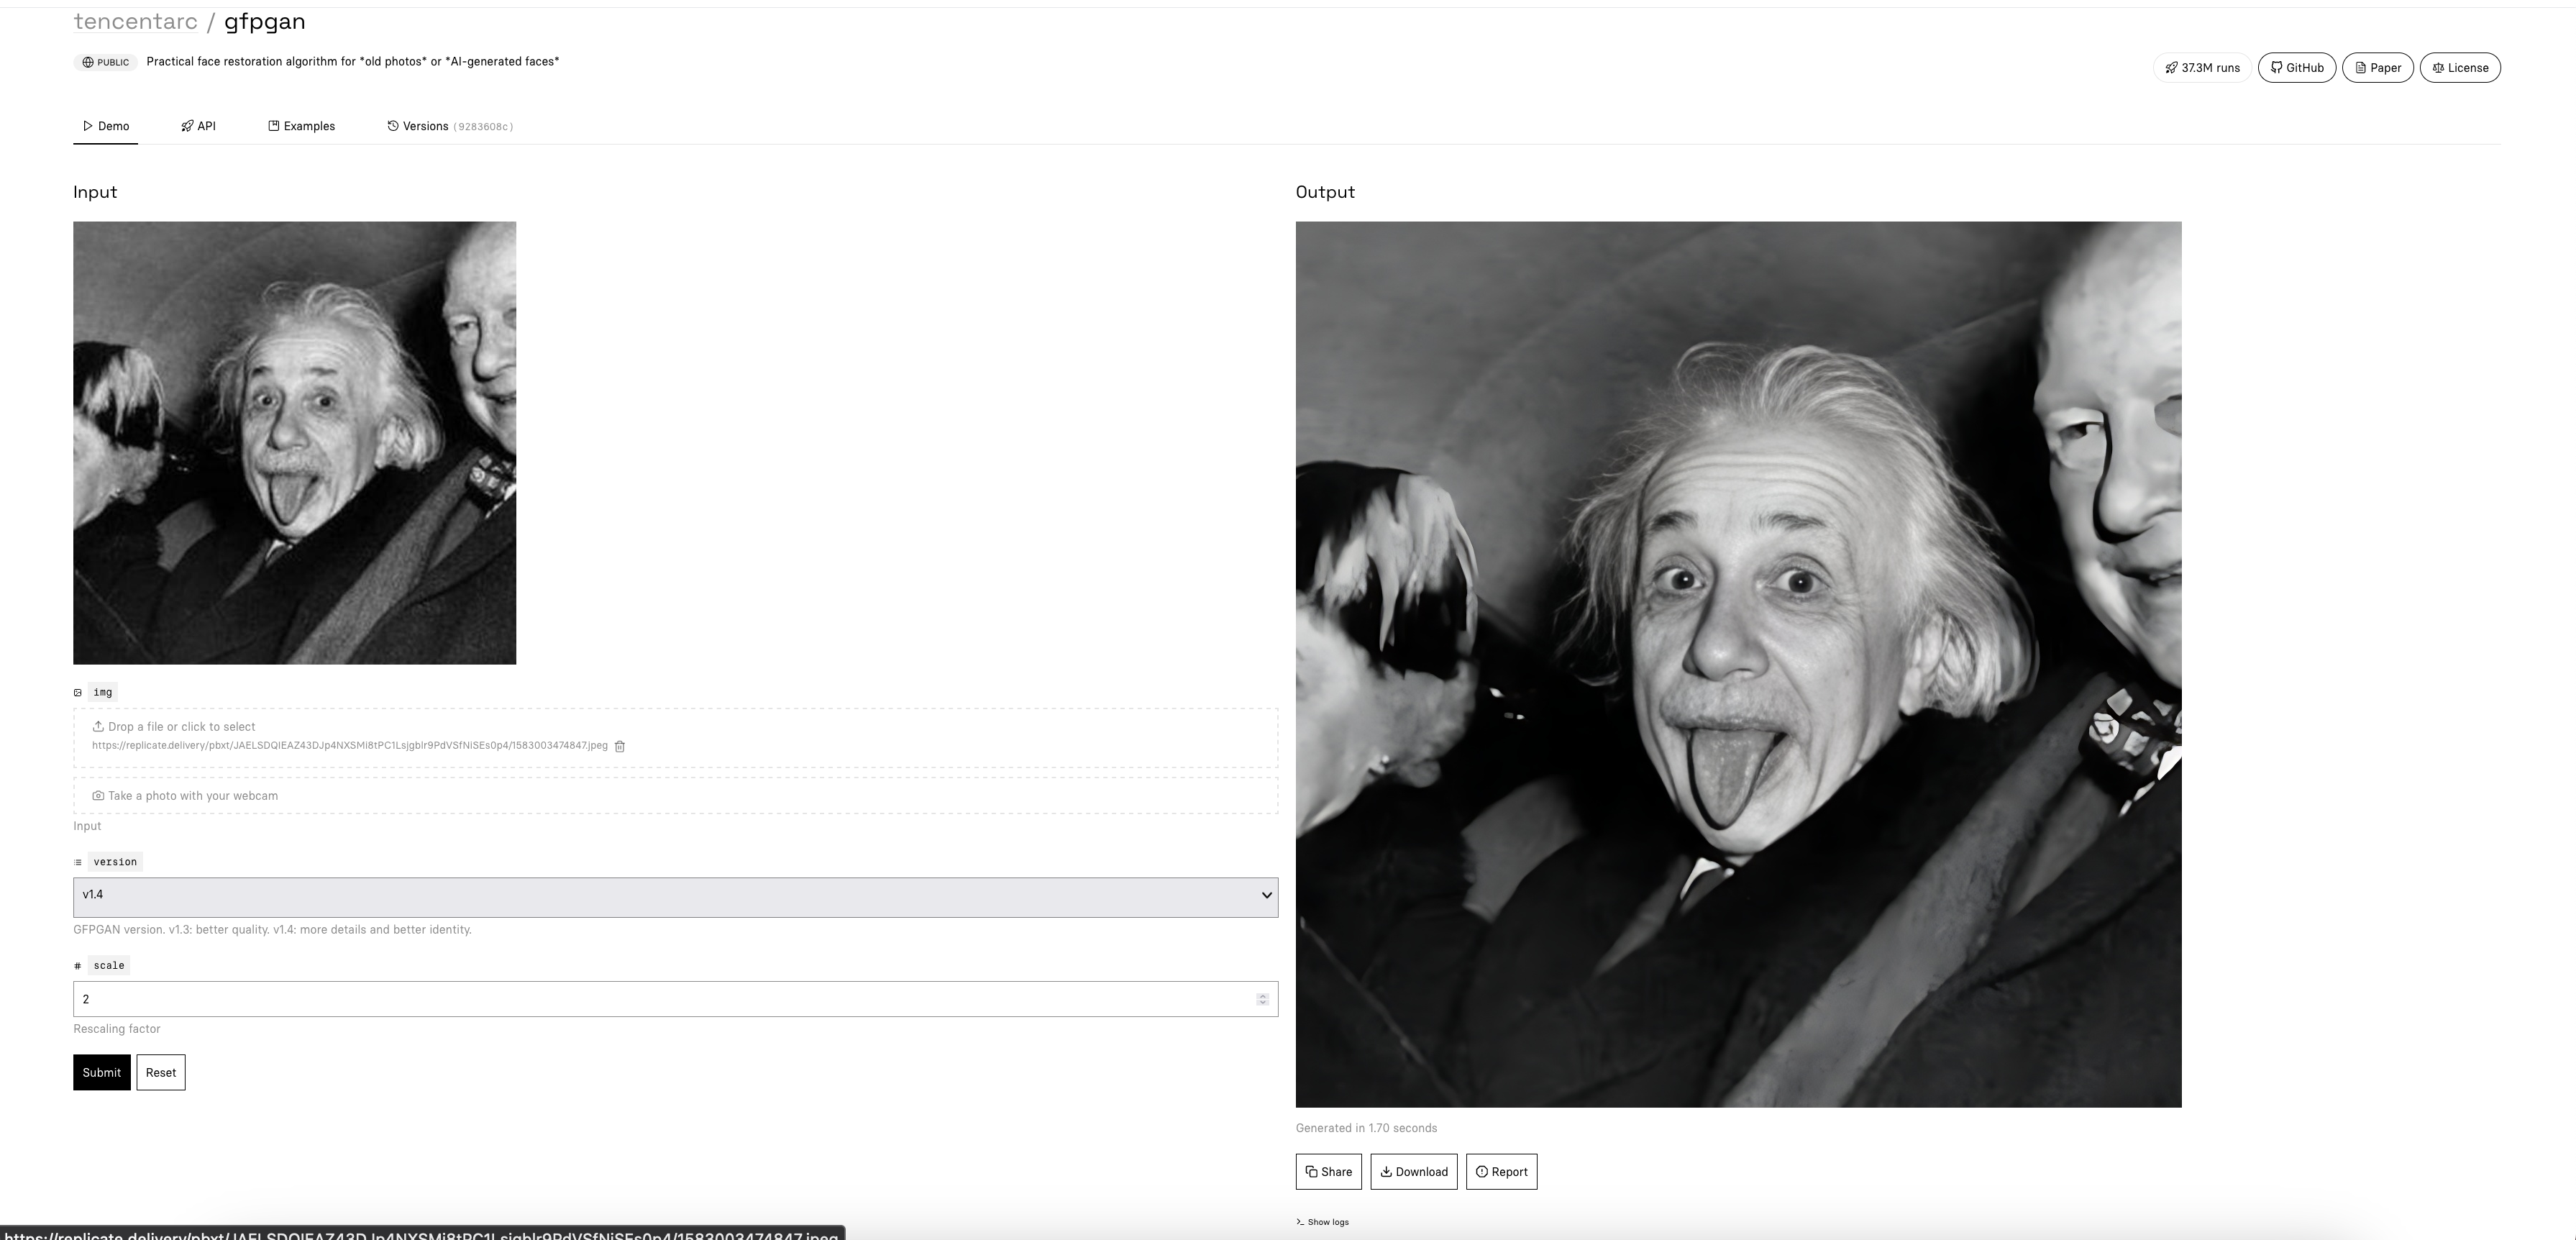
Visit the Explore page, which will have various models that we can try. For example, we will test the gfpgan model in browser. The gfpgan model can be used for face restoration.
img and version are mandatory fields and in scale field we have to pass a float value.
Source: https://replicate.com/tencentarc/gfpgan
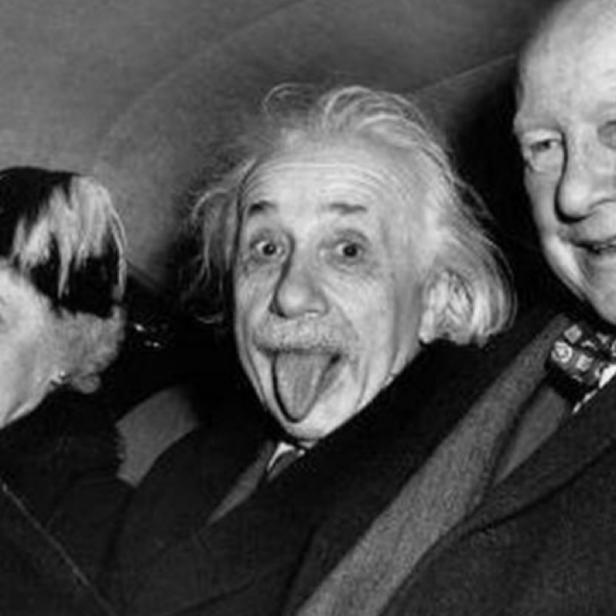
This was the original image added to img field (a low-quality and noisy picture of Albert Einstein).
And the output image generated by the model is a clean, scaled, and restored image,
Running model with API:
Similar to running the model in browser, we can run it with API.
Replicate doesn’t have an official gem at the time of writing this blog but there are community-maintained gems for both Ruby and Rails.
In this blog, we will be using replicate-rails gem to integrate Replicate API
in rails application.
ReplicateRails gem bundles the ReplicateRuby
we can use all the methods supported by ReplicateRuby in our rails application with ReplicateRails.
Before jumping into the integration part, let’s explore various methods supported in
ReplicateRuby and ReplicateRails gems.
Retrieve Model:
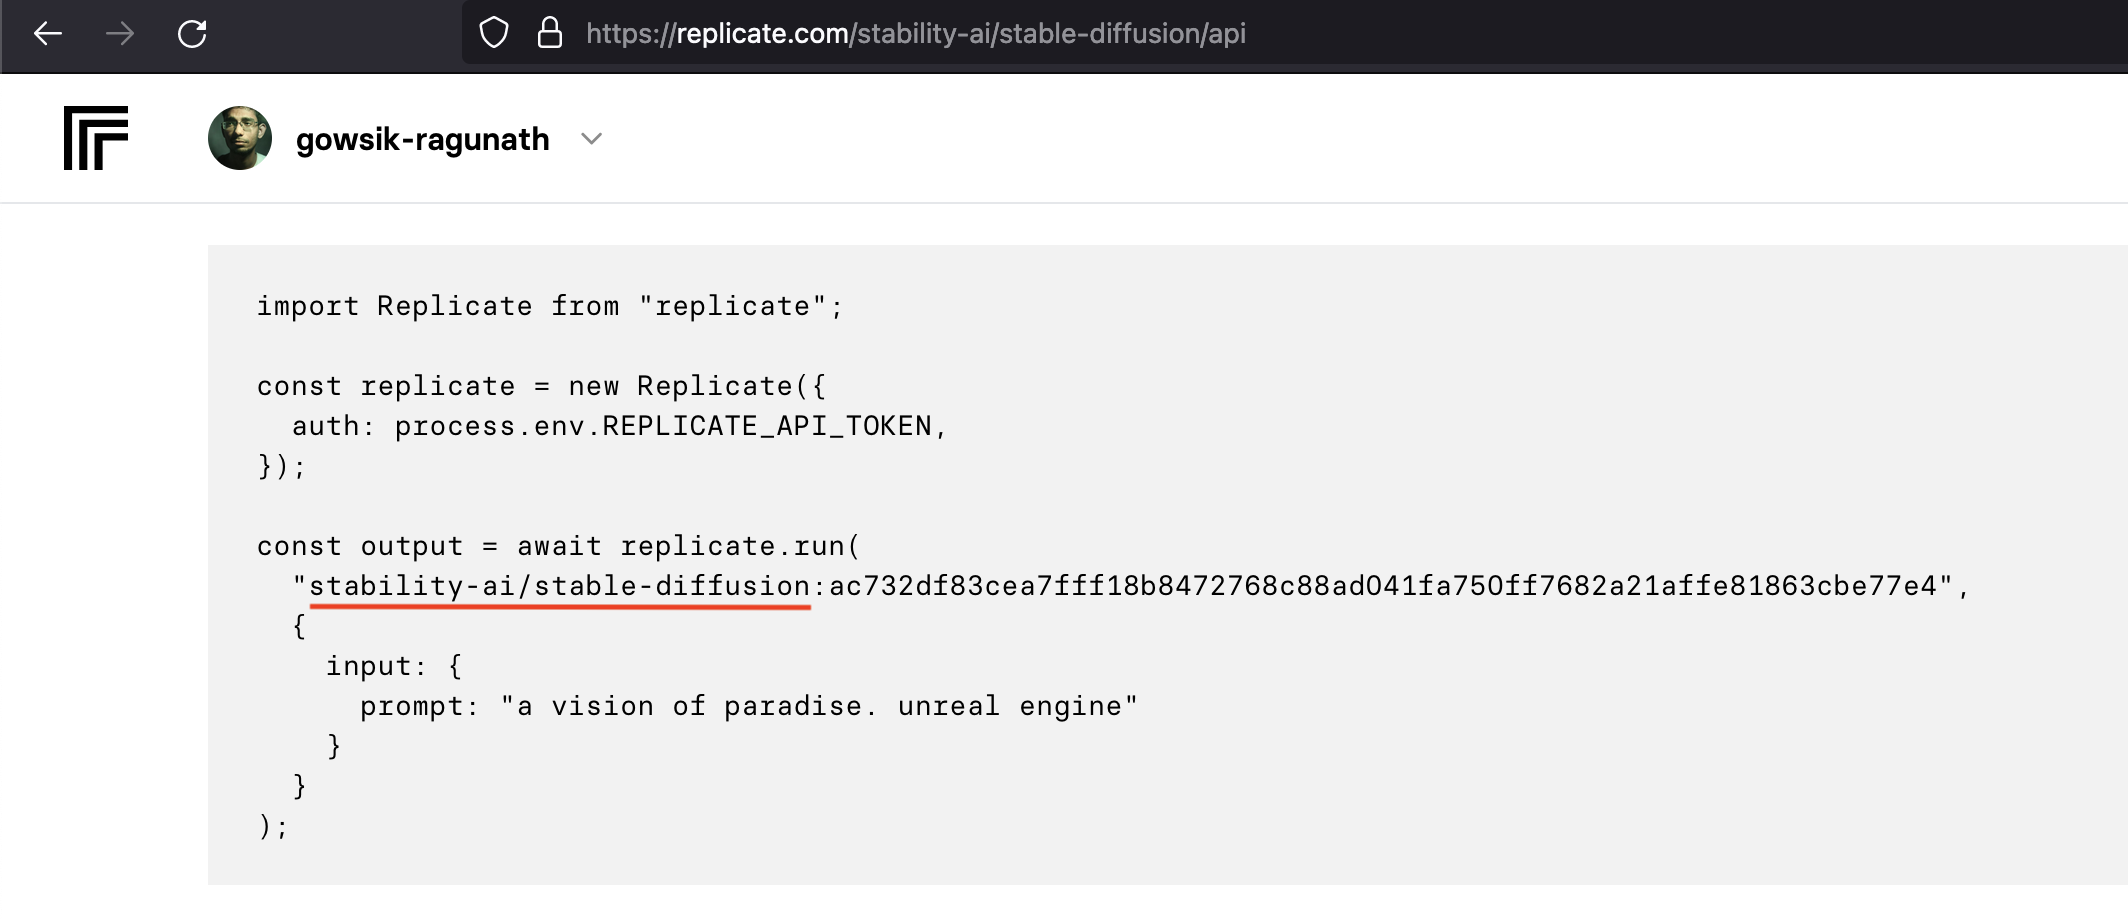
To retrieve a model using API we first need to find the model name.
In Replicate model page visit the API tab.
There will be step-by-step instructions about running the model, there we can find the model name(underlined in red) as shown in the image.
Source: https://replicate.com/stability-ai/stable-diffusion/api
# Retrieve model
model = Replicate.client.retrieve_model("stability-ai/stable-diffusion")
# Get the latest version
version = model.latest_version
This will retrieve the model object and to get the latest version we can chain the model object with the latest_version method.
If we want to get a specific version of a model we can use this command instead,
##### Pass ID value to the version key to get a specific version of the model
version = Replicate.client.retrieve_model("stability-ai/stable-diffusion", version: "<id>")
Run Prediction:
After retrieving the model and selecting the version we can run a prediction,
# without webhook url
prediction = version.predict(prompt: "a handsome teddy bear")

# with webhook url
prediction = version.predict(prompt: "a handsome teddy bear", "https://yourdomain.tld/replicate/webhook")
As we have chosen the stable diffusion model it only requires one field prompt based on the passed value
images will be generated.
The required fields will change for each model, check the API page to know more about the API and required fields.
In the predict method, we can also pass the webhook URL which will send back a response when the prediction is completed
or canceled.
Refetch, retrieve, and cancel prediction:
If we don’t pass the webhook url then we have to manually check the status of the prediction. To check the prediction status run the following command,
# without webhook url
prediction = version.predict(prompt: "a handsome teddy bear")

# manually refetch the prediction status
prediction = prediction.refetch
If we want to cancel the prediction then we can run the following command,
# without webhook url
prediction = version.predict(prompt: "a handsome teddy bear")

# manually refetch the prediction status
prediction = prediction.cancel
Each prediction has a unique ID even if we lose the prediction object we can retrieve it by passing the ID to the following command,
# retrieve prediction
prediction = Replicate.client.retrieve_prediction(id)
Get Prediction Output:
Once the prediction is completed we can get the output using the following command,
# get output of a succeeded prediction
output = prediction.output

# #<Replicate::Record::Prediction:22860 id: "prhpjbzb2x5lbjspttst54ypc4", version: "9283608cc6b7be6b65a8e44983db012355fde4132009bf99d976b2f0896856a3", input: {"img"=>"data:image/jpeg;base64,...", "scale"=>2, "version"=>"v1.4"}, logs: "/tmp/tmpbd73lp0lfile.jpg v1.4 2.0 0.5\n", output: "https://replicate.delivery/pbxt/YqQ7hBkflWyqRSyIGi8czd3kMiePVWrCrREaJ0ZVJXlpVaPRA/out..jpg", error: nil, status: "succeeded", created_at: "2023-07-13T12:51:52.220037Z", started_at: "2023-07-13T12:51:52.251012Z", completed_at: "2023-07-13T12:51:53.505575Z", webhook: "https://26b1-117-253-182-229.ngrok-free.app/replicate/webhook", webhook_events_filter: ["completed"], metrics: {"predict_time"=>1.254563}, urls: {"cancel"=>"https://api.replicate.com/v1/predictions/prhpjbzb2x5lbjspttst54ypc4/cancel", "get"=>"https://api.replicate.com/v1/predictions/prhpjbzb2x5lbjspttst54ypc4"}>
The output response will have prediction id, status, output URL, and other metadata.
Integrate Replicate API in Rails:
I have created a Rails application and integrated Replicate API, the application is available in this repository. You can use this repository to test the integration.
1) Set ENV variable:
First, we need to get the Replicate API token to make an API request.
We can find the API keys in API token page, copy that
and set the token to REPLICATE_API_TOKEN environment variable like this,
export REPLICATE_API_TOKEN=xxxxxxxxxxxxxx2) Add replicate-rails Gem:
Then, we need to add the gem in Gemfile,
## Gemfile

gem 'replicate-rails', require: 'replicate_rails'
and run bundle install this will install the replicate rails gem and all the dependencies.
3) Add Ngrok to development.rb
In the development environment, we need to set up an endpoint to receive a webhook response during app testing.
Ngrok will expose our local server to the internet. The installation setup will be available on the Ngrok site.
ngrok http 3000

// Session Status
// Web Interface  http://127.0.0.1:4040
// Forwarding     https://a258-117-206-136-164.ngrok-free.app -> http://localhost:3000
Running this command will expose the local server and will generate a forwarding URL.
export NGROK_URL="a258-117-206-136-164.ngrok-free.app"In a separate terminal, add the URL to NGROK_URL environment variable.
# config/development.rb

config.hosts << ENV["NGROK_URL"]
In config/development.rb, add forwarding url to config.hosts.
4) Set API token and webhook adapter:
In config/initializers create a new file called replicate.rb and add the below code,
## config/initializers/replicate.rb

# Set API token
Replicate.client.api_token = ENV["REPLICATE_API_TOKEN"]

# This class will handles the webhook sent by Replicate
class ReplicateWebhook
  def call(prediction)
    runner = Runner.find_by(prediction_id: prediction.id)
    return if runner.nil?

    runner.update(status: prediction.status, output: prediction.output)
  end
end

ReplicateRails.configure do |config|
  config.webhook_adapter = ReplicateWebhook.new
end
When the rails server starts the Replicate API token and webhook adapter will be set.
When the webhook is received the runner record will be updated with the Output(image URL in this case) generated by the model and the status of the prediction.
5) Add routes to handle Webhook:
Add a route to handle the Replicate webhook response,
## config/routes.rb
mount ReplicateRails::Engine => "/replicate/webhook"
Whenever a Post request is received in /replicate/webhook path, the request will be
handled by the ReplicateWebhook class which we have set as the webhook adapter.
6) Service that send prediction request:
In the service, we will be using tencentarc/gfpgan model.
# app/services/replicate_prediction.rb

class ReplicatePrediction
  attr_reader :record
  attr_writer :version, :inputs

  def initialize(record)
    @record = record
    @version = nil
    @inputs = {}
  end

  def process
    retrieve_model
    convert_to_base64
    send_request
  end

  private

    def retrieve_model
      # Retrieve the latest version of the model
      model = Replicate.client.retrieve_model("tencentarc/gfpgan")
      @version = model.latest_version
    end

    def convert_to_base64
      # Convert the document to base64 and pass it as img input
      document = record.document.download
      base64_image = Base64.strict_encode64(document)
      base64_image_url = "data:image/jpeg;base64,#{base64_image}"

      @inputs = {
          img: base64_image_url,
          version: "v1.4",
          scale: 2
        }
    end

    def send_request
      # Run prediction and capture the prediction ID and status of prediction
      prediction = @version.predict(@inputs, "https://#{ENV['NGROK_URL']}/replicate/webhook")
      record.update(prediction_id: prediction.id, status: prediction.status)
    end
end
To call this service,
# Call the service to raise a prediction request in Replicate

# These are the column available in Runner model

# t.string "prediction_id"
# t.string "output"
# t.string "status"

# Then an has_one_attached ActiveStorage association to document

ReplicatePrediction.new(Runner.first).process
When the record is passed to ReplicatePrediction service and is executed, the document stored in ActiveStorage will
be converted to Base64 and the input params will be constructed with the Base64 value in img key which will then
be passed to the predict method with the webhook URL.
Then the prediction id and status will be added to the record.
7) Webhook reponse:
Once the prediction is completed or failed a webhook response will be sent back to the endpoint
that we have passed in the predcit method.
## config/initializers/replicate.rb

# This class will handles the webhook sent by Replicate
class ReplicateWebhook
  def call(prediction)
    runner = Runner.find_by(prediction_id: prediction.id)
    return if runner.nil?

    runner.update(status: prediction.status, output: prediction.output)
  end
end
The ReplicateWebhook class which we have set as the webhook adapter will handle finding the record and set
the status and output value.
For the model the output value will be a URL, the output value will differ based on the model that we use.
Conclusion:
In recent times, integrating AI into web applications has become significantly easier. It allows us to effortlessly execute diverse machine learning models and obtain the desired outcomes, all without investing countless hours in comprehending algorithms and fine-tuning the models. With Replicate we can discover the most suitable model that aligns with our requirements and seamlessly integrates it into our application in a minimal amount of time.


