This post is also published in blog.saeloun.com and featured in Ruby Weekly issue #653.
What is Amplify?
AWS Amplify is a full-fledged solution that lets us build, ship, and host full-stack applications on AWS using AWS services.
By using Amplify we can also host static sites and it has a fully managed CI/CD workflow which is super easy to set up it is as simple as connecting the git branch and setting up the domain.
Why we switched to Amplify?
Previously we hosted the Saeloun blog on Netlify but the problem is we are a large team and we want to add multiple users as team members to handle the build, and deployment of our blog. As Netlify charges $19/month per member(at the time of writing) we have to spend hundreds of dollars to run this blog.
We then migrated the blog to AWS Amplify because it supports most of the features we use in Netlify like PR preview and CI/CD pipeline. Most of all we can add unlimited users in Amplify and don’t have to pay any additional charges based on user count.
Amplify pricing is based on,
- Build time ($0.01 per minute)
- Data storage ($0.023 per GB per month)
- Data tranfer out ($0.15 per GB served)
- Request count ($0.30 per 1 million requests)
- Request duration ($0.20 per hour (GB-hour))
Amplify pricing page has examples of calculating the per-month charge ref.
After migrating to Amplify we are paying less than $50 per month.
Setup a Jekyll blog in AWS Amplify:
1) Adding repository branch
Note: You must have administrator privileges for the git repository to set up the Jekyll blog in AWS Amplify.
- Sign in to the AWS console and navigate to AWS Amplify
- Click on the New app button at the top right and choose Host web app
- Choose the git provider and click Continue, we have the blog repository in GitHub.
- Choose the repository from the recently updated repositories dropdown.
- If the repository is not listed then click on the View GitHub permissions button and grant Amplify the repository access.
- Once the repository access is granted you will see the repository listed in the Recently Updated Repositories dropdown
- Choose the repository and branch then click on Next.
2) Build setting
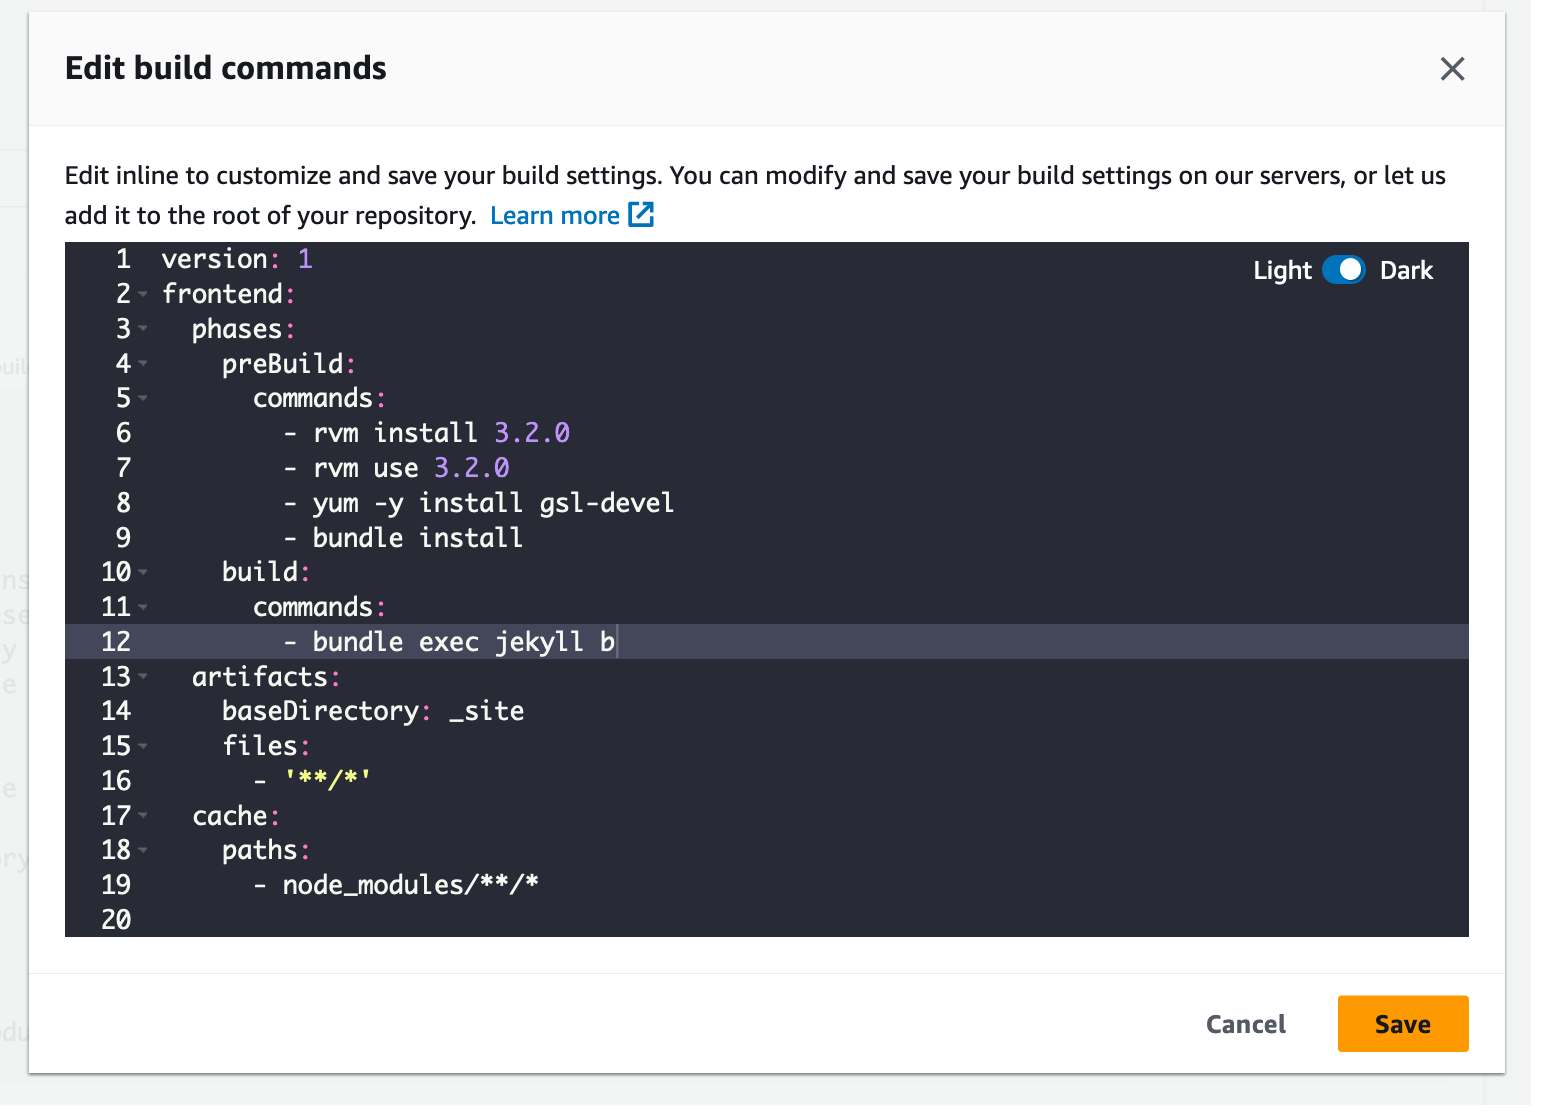
At the time of writing the Dockerfile used by AWS Amplify uses only Ruby 2.4 and 2.6 but to deploy our blog we have to install Ruby 3.2.0 and other Linux libraries which we can install by adding commands in preBuild or we can build our own custom Docker image and use it.
- Set an App name by default repository name will be auto-filled
- To add a command to install ruby and other libraries click on the Edit button
- We added the following lines under preBuild command to install the ruby and Linux libraries,
- rvm install 3.2.0
- rvm use 3.2.0
- yum -y install gsl-devel
- bundle install
Found this workaround in this GitHub issue.
3) Review
Review the repository details and app settings and click on the Save and Deploy button.
This will start creating the app in Amplify, we can see the progress of deployment in the dashboard once the deployment is completed we can access the site with the URL provided by Amplify.

4) Setting up a domain
If the site works fine then we can point the static site hosted in Amplify to the custom domain.
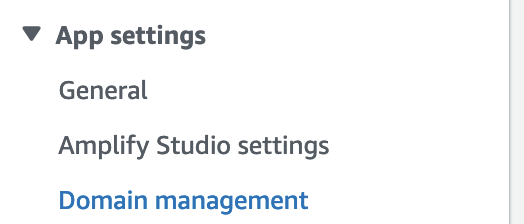
- On the side navbar click on Domain Management option under App settings.
- Click the Add domain button on the top right.
- Type the domain URL in the Domain field and click on Configure domain button.
- Exclude root URL to point only subdomain to the Amplify site
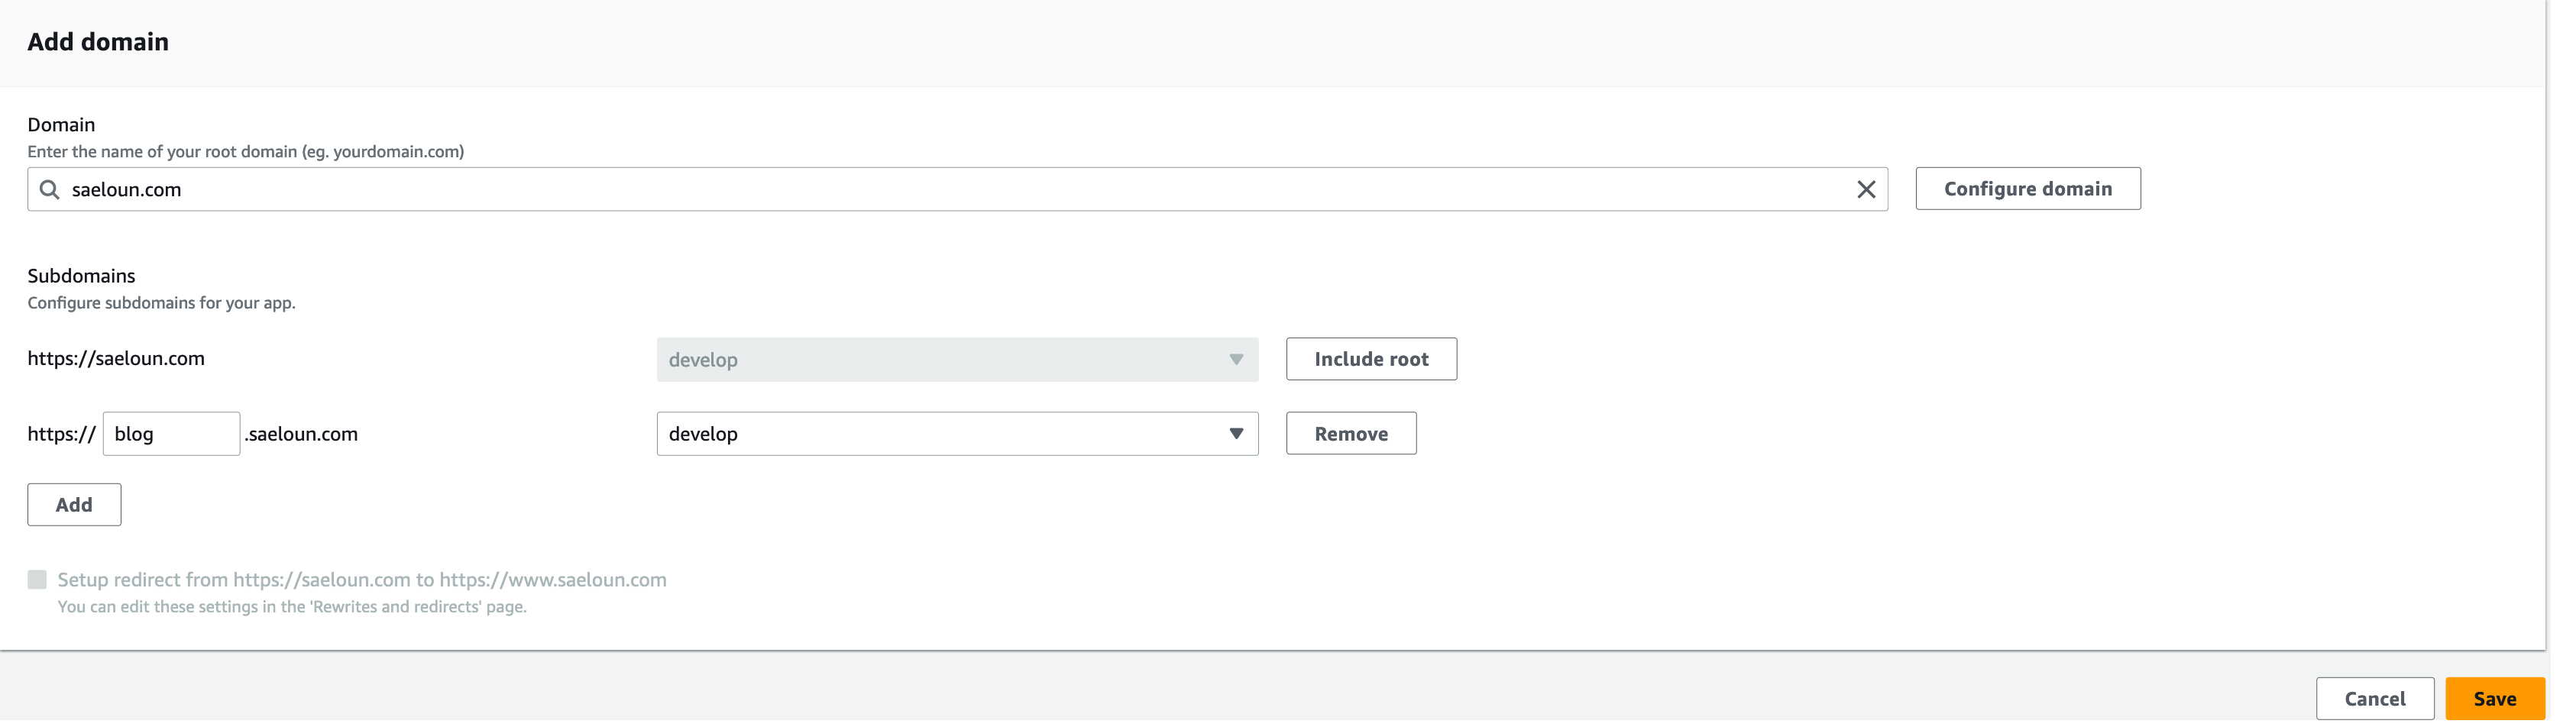
- Click on Save.
- Amplify will create an SSL certificate.
- Once the SSL certificate is created, verify domain ownership by configuring a CNAME record with the values provided.
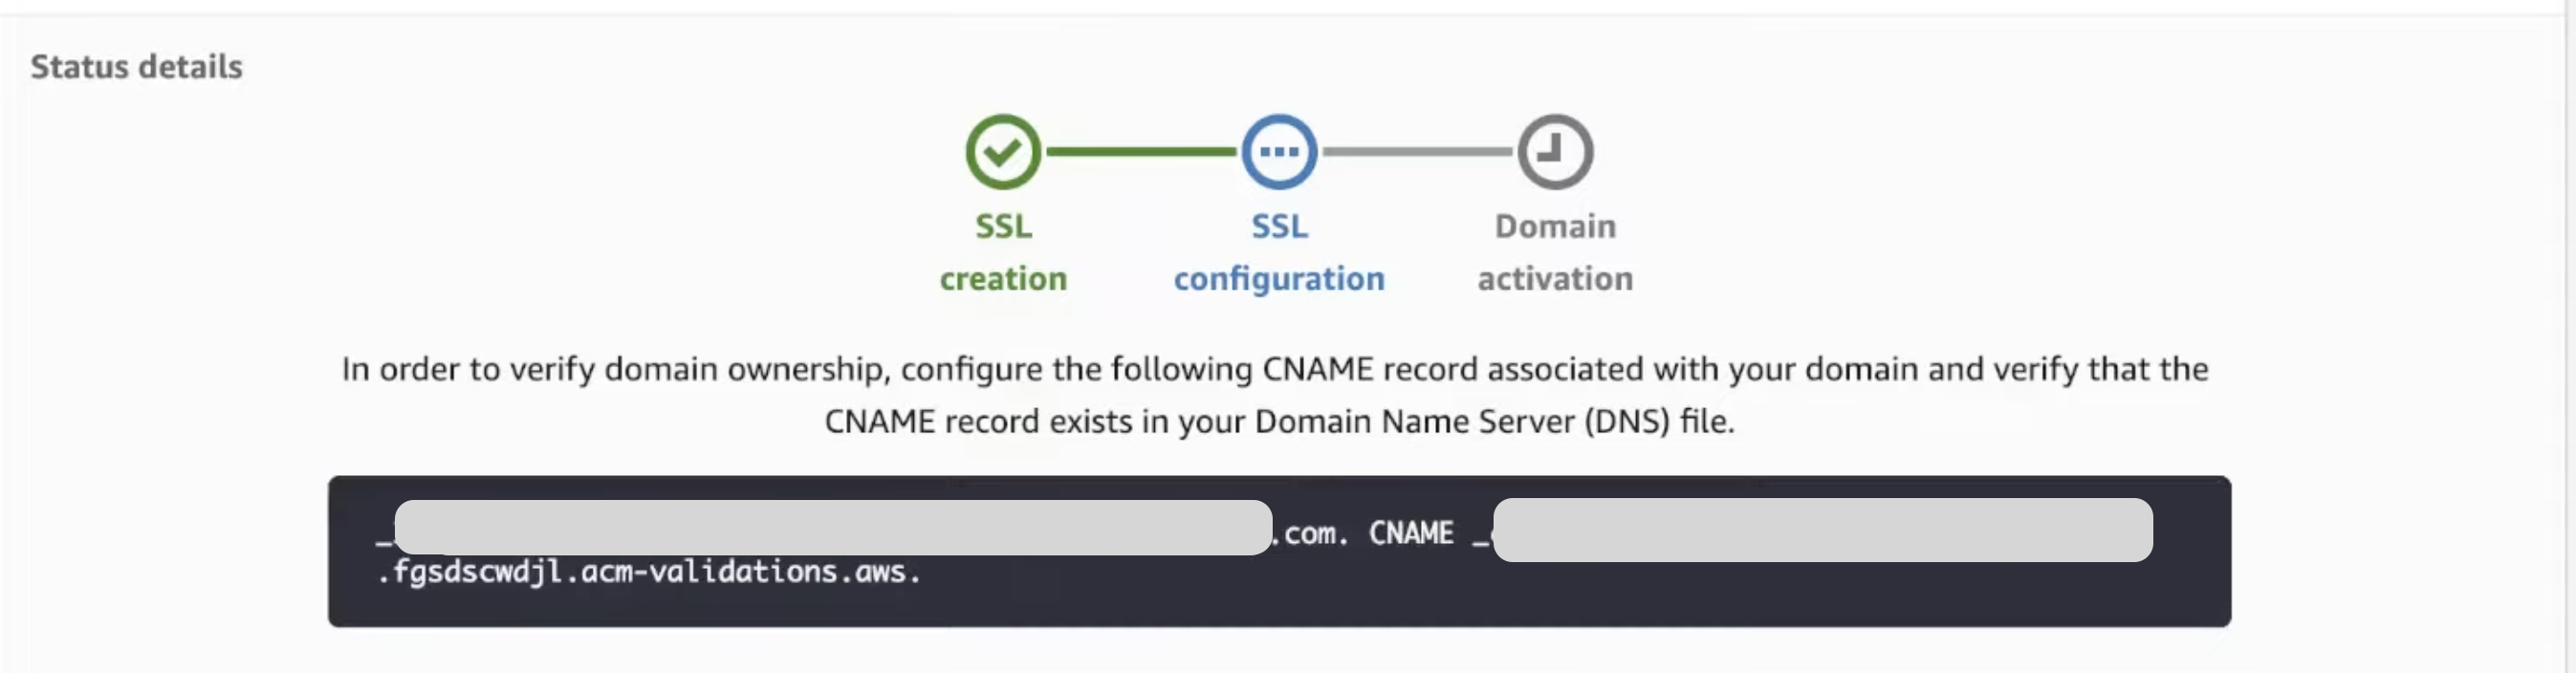
- In our case, we added the CNAME record in Namecheap

- After adding the verification CNAME, back in AWS amplify click on the Action dropdown
- Click the View DNS Record button

- If only a subdomain is added we just need to add a CNAME record in the domain registrar if a root domain is added then we have to add A and CNAME records in the domain registrar

- Copy and add the record to the domain registrar

- In a few minutes all the three statuses will have a green check mark
- Visiting the configuration domain URL and the site hosted in Amplify will load
5) Enable preview
In the side navbar click on the Previews option under App settings, then click on Enable Preview and Install the GitHub app in the repository.
Now whenever a new PR is raised Amplify will build the app and when the build is successful Amplify bot will post the preview link as a comment on the PR.
Conclusion
Along with Jekyll, Amplify can also host Gatsby and Next.js sites and if you are looking for a way to cut down costs on hosting your blog or other static sites without paying any additional cost based on user count then AWS Amplify will be the best alternative for you.